Imagine walking into a room where shots were just fired. The silence is heavy, but the evidence is screaming to be heard. Every spent casing on the floor, every bullet hole in the wall, and every smudge of residue tells a story about what happened, who was there, and how they moved. If you get this wrong-even by an inch-the entire reconstruction falls apart. That’s why shooting scene documentation isn’t just paperwork; it’s the backbone of any firearm investigation.
We’re not talking about snapping a few photos and bagging up brass. We’re talking about a rigorous, scientific process governed by strict standards like the NIST OSAC 2021-N-0019. This standard practice ensures that when a case goes to court, the physical evidence holds up under scrutiny. It connects the weapon to the location, the shooter to the victim, and the chaos of the moment to a clear, defensible timeline.
The First Rule: Secure the Scene Before You Breathe
Before you even think about measuring distances or taking photos, you have to lock down the area. Foot traffic is the enemy of evidence. Every step taken across a carpet or concrete floor can displace a tiny fragment of gunshot residue or shift a light cartridge case. According to best practices outlined by agencies like the Santa Barbara Sheriff's Office, absolute security must be afforded to the crime scene until all spent cartridges are properly recorded.
This means banning non-essential personnel from the immediate vicinity. Why? Because once you start moving around, you introduce variables you can’t control. A witness stepping over a casing might knock it into a drain. An officer leaning against a wall might wipe away critical GSR patterns. The goal here is preservation. You need the scene exactly as it was left, frozen in time, so your measurements reflect reality, not contamination.
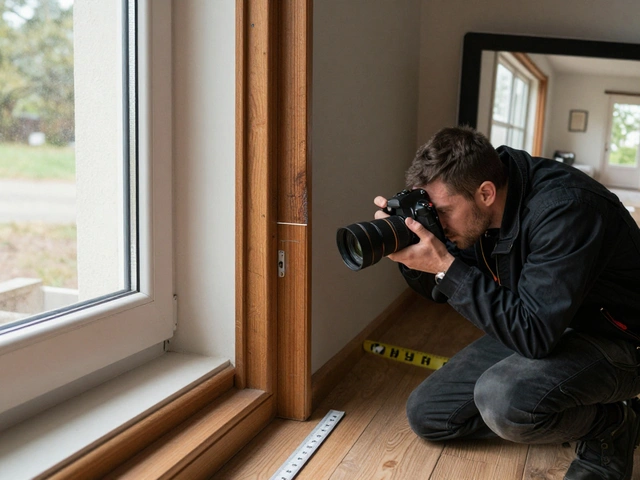
Photography: The Visual Anchor
Photography is your first line of documentation, but it has to be done in a specific order to be useful later. You don’t just zoom in on the bullet hole. You follow a logical progression that allows anyone looking at the images years later to understand the context.
- Overall Scene Photos: Start wide. Capture the entire room or outdoor area. Show the relationship between the body, the weapons, and the exits. This establishes the "big picture."
- Medium Distance Shots: Move closer. Frame the specific area where evidence is clustered. Include reference points like door frames, furniture legs, or distinct floor tiles.
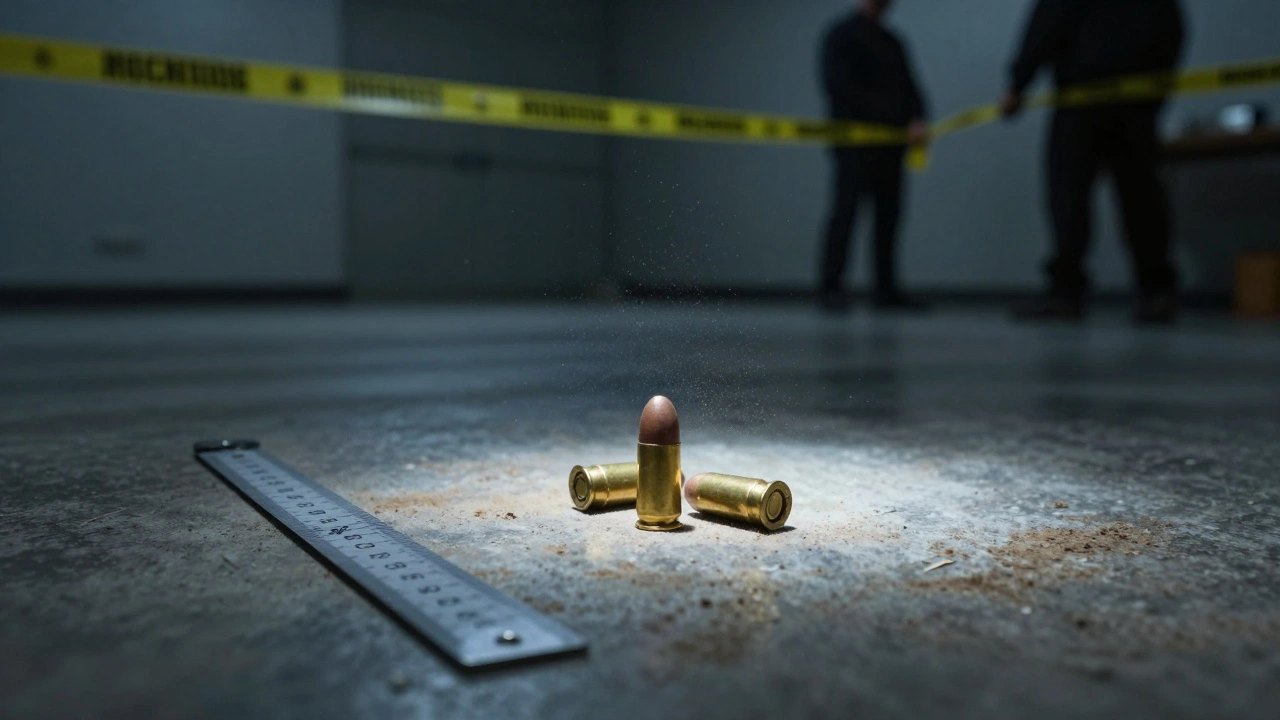
- Close-Up Imagery: Now you focus on the individual pieces of evidence. Each spent casing needs its own shot, ideally with a scale ruler placed next to it for size reference.
A crucial tip often missed: include nearby objects in your close-ups. Don’t isolate the casing on a white background. Show it next to the baseboard or the crack in the pavement. This helps establish the true position of the evidence relative to fixed structures. As noted in training materials from the National Institute of Justice (NIJ), these contextual details are vital for later reconstruction.
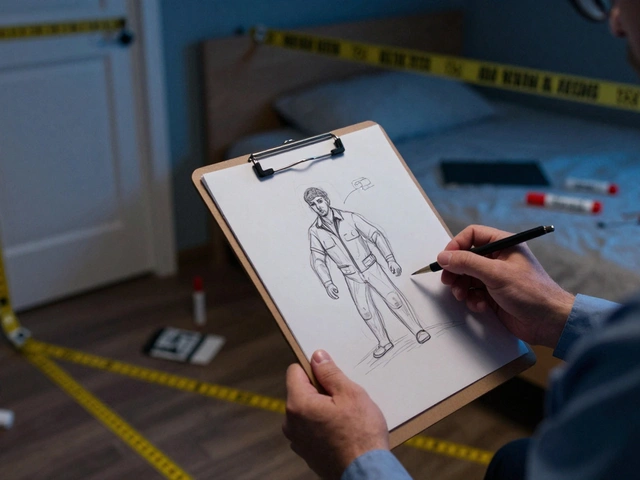
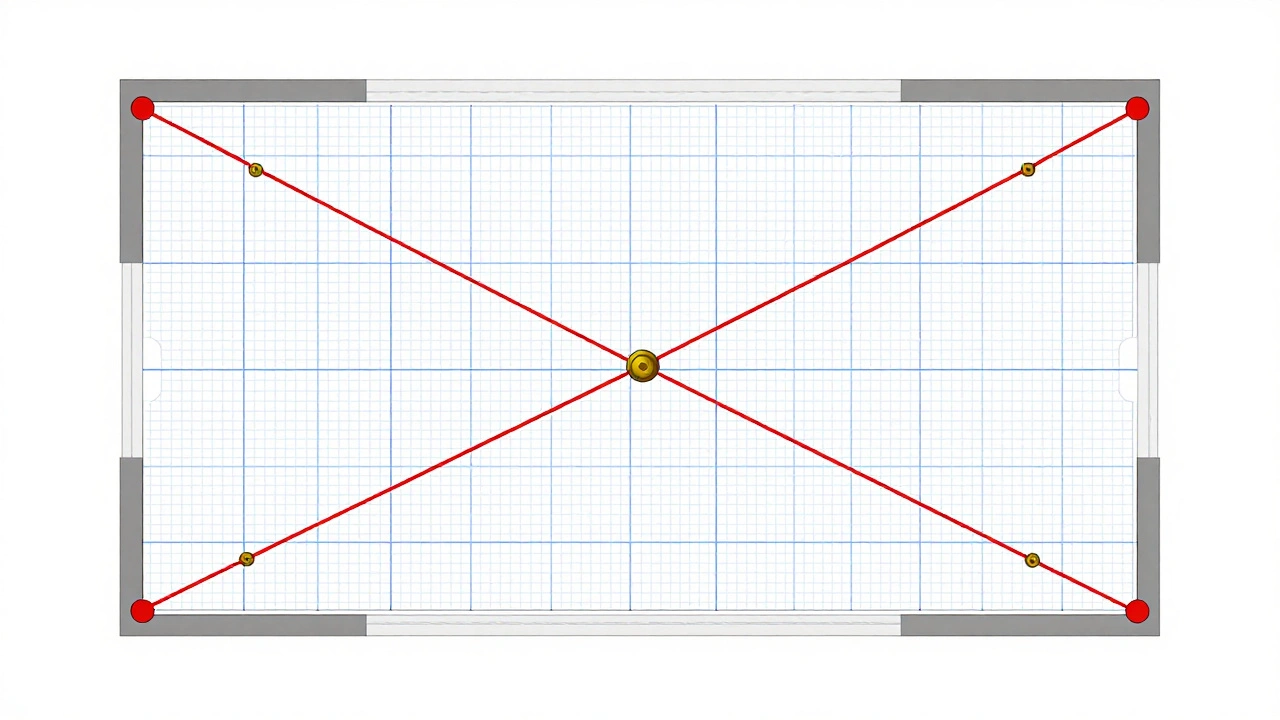
Mapping the Brass: Triangulation vs. Coordinates
Once the photos are taken, you need a permanent record of where every piece of evidence lies. This is where sketching comes in. You can’t rely on memory, and photos alone don’t give you precise distances. You need a formal crime scene sketch that locates each spent casing using either triangulation or coordinate methods.
Triangulation involves measuring the distance from two fixed points (like two corners of a room) to the evidence. It’s simple and effective for smaller areas. Coordinate mapping, on the other hand, uses a grid system, which is better for larger scenes or outdoor environments. Regardless of the method, precision is key. Use a steel tape measure, not a fabric one, to avoid stretching errors.
Here’s a pro tip: always have an assistant verify your measurements. Have them read out the numbers while you write them down, or vice versa. This double-checking prevents transcription errors that could be exploited in court. According to procedural standards, each fired cartridge case should be individually labeled with headstamps described or photographed, and its location documented within the scene sketch. If casings are found inside a structure, it indicates indoor shooting, necessitating a thorough search of all connected rooms for additional bullet holes.
Handling Evidence: What to Mark and What Not To
This is where many investigators make costly mistakes. You need to identify evidence without destroying its forensic value. The rules differ depending on whether you’re dealing with a cartridge case or a bullet.
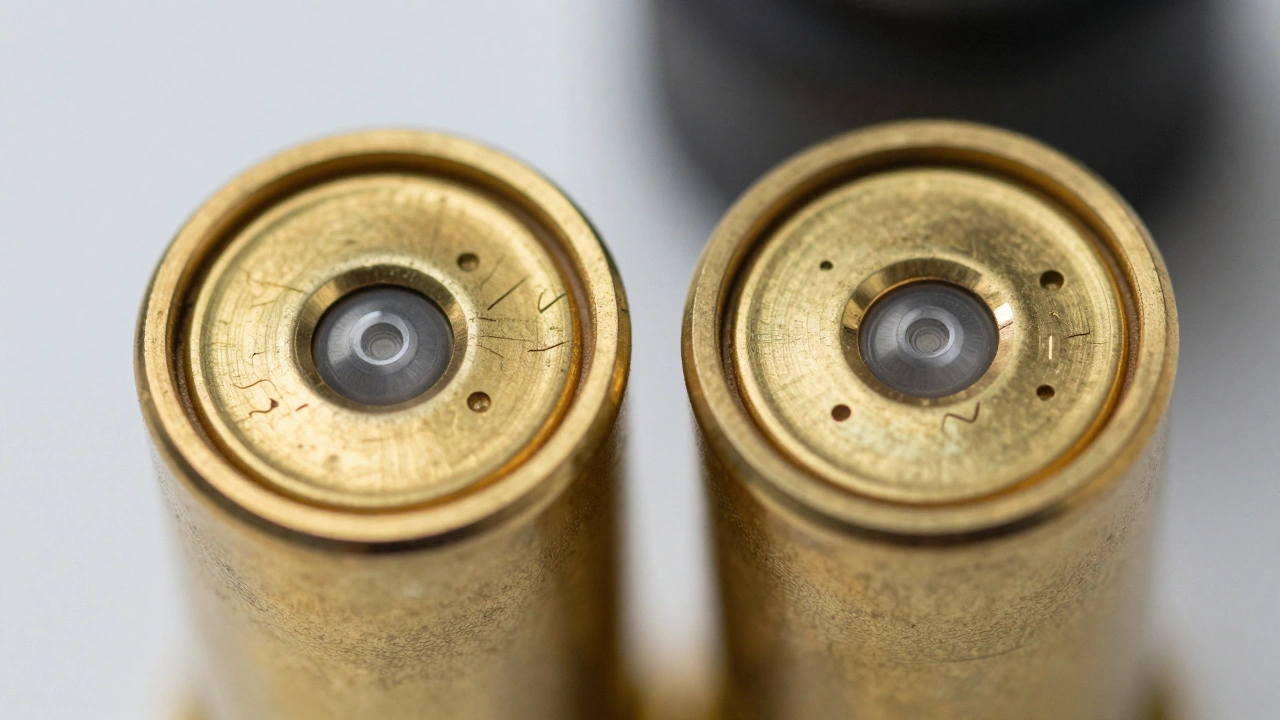
For cartridge cases, if your agency protocol mandates direct marking, use a metal scribe. Mark inside the mouth of the case or on the side near the mouth. Permanent markers tend to fade after normal handling in the lab, so ink is risky. For fired shotshell cases, mark at the metallic base where it joins the plastic body. However, never mark the primer or the firing pin impression area-that’s the data you need for comparison.
But here’s the big rule: never mark bullets directly. Standards explicitly prohibit this because marking can interfere with the microscopic examination of fired bullet characteristics. Bullets are collected whole, placed in pill boxes or small manila envelopes, and kept separate from casings. The marks on the bullet-rifling impressions, lands, and grooves-are unique to the barrel that fired them. Scratching them ruins the ability to match the bullet to a specific firearm.
Trajectory Reconstruction: From String to Lasers
Knowing where the casings landed is only half the battle. You also need to know where the bullets went. This is trajectory reconstruction, and it ranges from low-tech to high-tech.
The string method is the most accessible approach. You insert a rod into the entry point of a bullet hole and another into the exit point (if applicable). Then, you run a string between them. It’s cheap, easy to photograph in daylight, and gives a clear visual representation of the bullet’s path. Crime scene analyst Matthew Steiner notes that string remains a reliable method because it doesn’t require darkening the room, unlike laser methods.
For more complex scenarios, trajectory rods offer greater rigidity and precision. They allow you to calculate angles of incidence and elevation more accurately. But the cutting edge is 3D laser scanning. Systems like the Leica RTC 360 can scan an entire room in minutes, capturing millions of data points. This digital twin of the scene allows analysts to calculate precise trajectory angles in software, revisit the data without returning to the scene, and present compelling visualizations in court. It’s a significant advancement from traditional methods, offering documentary precision that can be reanalyzed indefinitely.
Ballistic Comparison: Linking Fire to Weapon
Once the scene is documented, the evidence moves to the lab for comparative ballistics. This is where the unique marks left by the firearm come into play. When a bullet is fired, the breechface, firing pin, and ejector leave distinctive tool marks on the cartridge case. These marks are like fingerprints-they are unique to that specific gun.
Examiners use a comparison microscope to view a questioned cartridge case alongside a known exemplar (a test fire from a suspect weapon) simultaneously. If the microscopic striations and impressions align, the examiner can conclude that both were fired from the same firearm. Similarly, bullets are compared for caliber, type, and make, with magnified images of rifling marks used to determine if they came from the same barrel.
| Method | Precision | Cost | Best Use Case |
|---|---|---|---|
| String Method | Moderate | Low | Quick visualization, daylight photography |
| Trajectory Rods | High | Medium | Accurate angle calculation, courtroom demonstration |
| 3D Laser Scanning | Very High | High | Complex scenes, digital archiving, remote analysis |
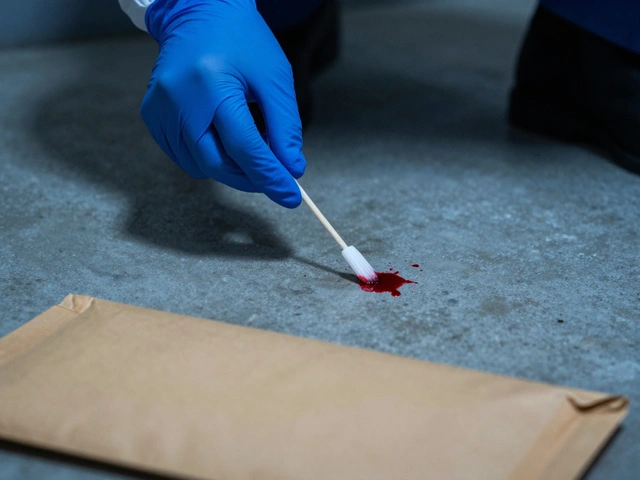
Integrating GSR and Spatial Data
Don’t forget Gunshot Residue (GSR). While cartridge mapping tells you where the gun was pointed, GSR patterns can tell you how close the shooter was to the target. NIST OSAC standards emphasize that GSR distance determination is a complementary methodology. By analyzing the spread and density of residue on clothing or walls, investigators can estimate the muzzle-to-target distance. Combine this with trajectory lines and casing locations, and you build a comprehensive geometry of the incident. You can pinpoint the shooter’s stance, the number of shots fired, and even the sequence of events.
Why is foot traffic restricted during shooting scene documentation?
Foot traffic can displace lightweight cartridge cases, disturb fragile gunshot residue patterns, and introduce foreign contaminants. Restricting access ensures that the evidence remains in its original position and condition, preserving the integrity of the scene for accurate measurement and legal admissibility.
What is the difference between triangulation and coordinate mapping?
Triangulation measures the distance from two fixed reference points to the evidence, creating a triangle. Coordinate mapping places the evidence within a grid system, assigning X and Y values. Triangulation is often easier for small, confined spaces, while coordinate mapping is better for large or irregular outdoor scenes.
Can I use a permanent marker to label cartridge cases?
It is generally discouraged. Ink from permanent markers can fade or smear during laboratory handling, potentially obscuring critical markings. If direct marking is required by agency protocol, a metal scribe should be used on the side of the case near the mouth, avoiding the primer and firing pin impressions.
Why are bullets never marked directly?
Marking a bullet can scratch or alter the microscopic striations left by the firearm’s rifling. These striations are essential for matching the bullet to a specific weapon. Any damage to these surfaces can compromise the ability to perform a positive identification.
How does 3D laser scanning improve trajectory reconstruction?
3D laser scanning creates a precise digital model of the entire scene. This allows analysts to calculate trajectory angles with high accuracy in software, revisit the data without returning to the physical scene, and create detailed visualizations for court presentations. It eliminates human error in manual measurements and provides a permanent, reproducible record.