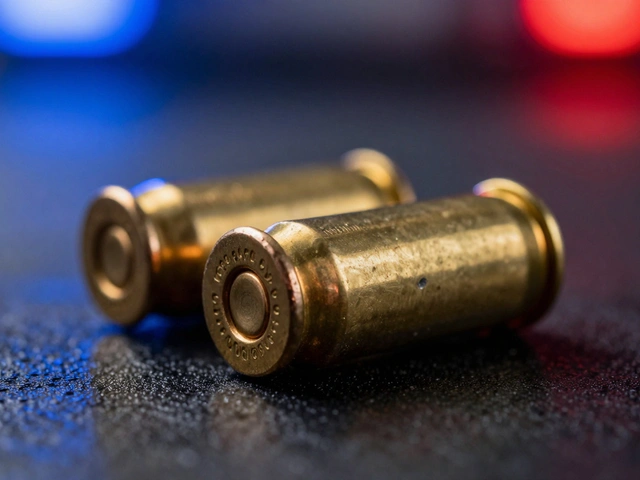
You find a pool of blood at a crime scene. Or maybe you’re investigating an arson case and suspect gasoline was used as an accelerant. In both scenarios, you are dealing with liquid evidence, which is any evidentiary material that is itself a liquid or contains recoverable liquid residues. The difference between a conviction and a dismissed case often comes down to how you handle that liquid in the first few minutes after discovery. Liquid evidence is notoriously unstable. It evaporates, it degrades, it grows mold, and it contaminates other items if you aren’t careful.
Whether you are a patrol officer, a crime scene investigator, or a forensic technician, getting this wrong can destroy the integrity of your entire case. This guide breaks down the specific best practices for collecting and storing different types of liquid evidence, from biological fluids to ignitable liquids, ensuring your samples hold up in court.
Quick Summary / Key Takeaways
- Biological Liquids: Air-dry thoroughly before placing in paper containers. Never store wet biological evidence in plastic bags due to mold growth.
- Ignitable Liquids (Fire Debris): Use airtight, non-porous metal paint cans or glass jars. Plastic and paper are porous and will cause volatile residues to evaporate or contaminate the sample.
- Toxicology Samples: Collect blood and urine in chemically compatible tubes with preservatives (like fluoride/oxalate). Refrigerate for short-term storage; freeze for long-term retention.
- Chain of Custody: Document every step. Seal all containers with tamper-evident tape and sign across the seal to prove no one accessed the evidence.
- Storage Environment: Keep evidence away from heat, sunlight, and moisture. Long-term storage (>72 hours) for biological samples should ideally be frozen (≤ −20 °C).
Understanding the Types of Liquid Evidence
Before you pick up a container, you need to know what you are dealing with. "Liquid evidence" isn't just one thing. It generally falls into three main categories, each with its own set of rules based on physical chemistry and biological stability.
First, we have biological liquids. This includes blood, semen, saliva, urine, and vitreous humor. These contain DNA and proteins that degrade rapidly if exposed to bacteria, mold, or extreme temperatures. The National Institute of Justice (NIJ) and the Innocence Project classify these under biological evidence protocols.
Second, there are ignitable liquids. Think gasoline, kerosene, lighter fluid, and solvents. These are volatile organic compounds. Their value lies in their chemical signature, which tells us about the cause of a fire. They evaporate quickly and can permeate many common materials.
Third, we have forensic toxicology specimens. These are liquid samples taken directly from victims or suspects-usually whole blood, serum, plasma, or urine-to test for drugs, alcohol, or poisons. The American Academy of Forensic Sciences (AAFS) provides specific guidelines for these because they require precise chemical preservation.
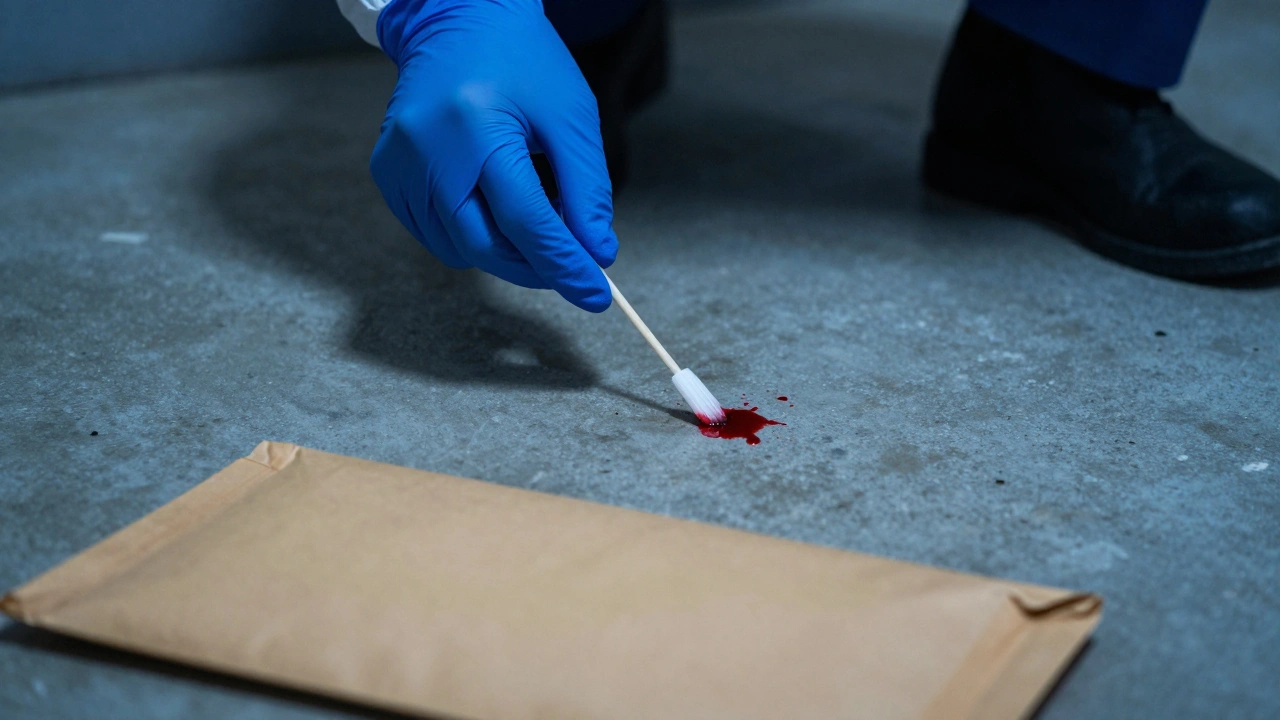
Collecting Biological Liquids: The Dry Rule
The biggest mistake people make with biological liquids is trying to keep them wet. If you collect a bloody shirt or swab a surface with blood, your goal is to dry it out as fast as possible. Why? Because moisture promotes microbial growth. Mold eats DNA. Bacteria break down proteins. Once that happens, your evidence is useless.
Here is the standard procedure:
- Use Sterile Tools: Always wear disposable latex or nitrile gloves and change them frequently. Use individually wrapped sterile swabs that are manufactured free of human DNA. Reusable tools must be wiped with a fresh 10% bleach solution (10:1 water to bleach ratio), as alcohol does not reliably destroy residual DNA.
- Absorb and Dry: If the liquid is pooled, absorb it onto sterile gauze or cotton swabs. If it’s soaked into clothing, do not put the wet clothing in a bag. Hang it up to air-dry completely. You can use drying cabinets or paper hang bags to speed this up.
- Paper Packaging Only: Once the item is completely dry, place it in a paper envelope or box. Paper allows air circulation, preventing condensation. Never package wet or damp biological evidence in plastic bags. The trapped humidity creates a greenhouse effect for mold.
- Exceptions: The only time you might use plastic for biologicals is if the item is extremely odorous after drying, but even then, it should be sealed tightly to prevent odor transfer, not moisture retention.
If you cannot dry the item immediately-for example, if you are in a humid environment without access to drying facilities-you should collect the liquid directly into laboratory-grade tubes containing appropriate preservatives and store them under temperature control until they can be processed.
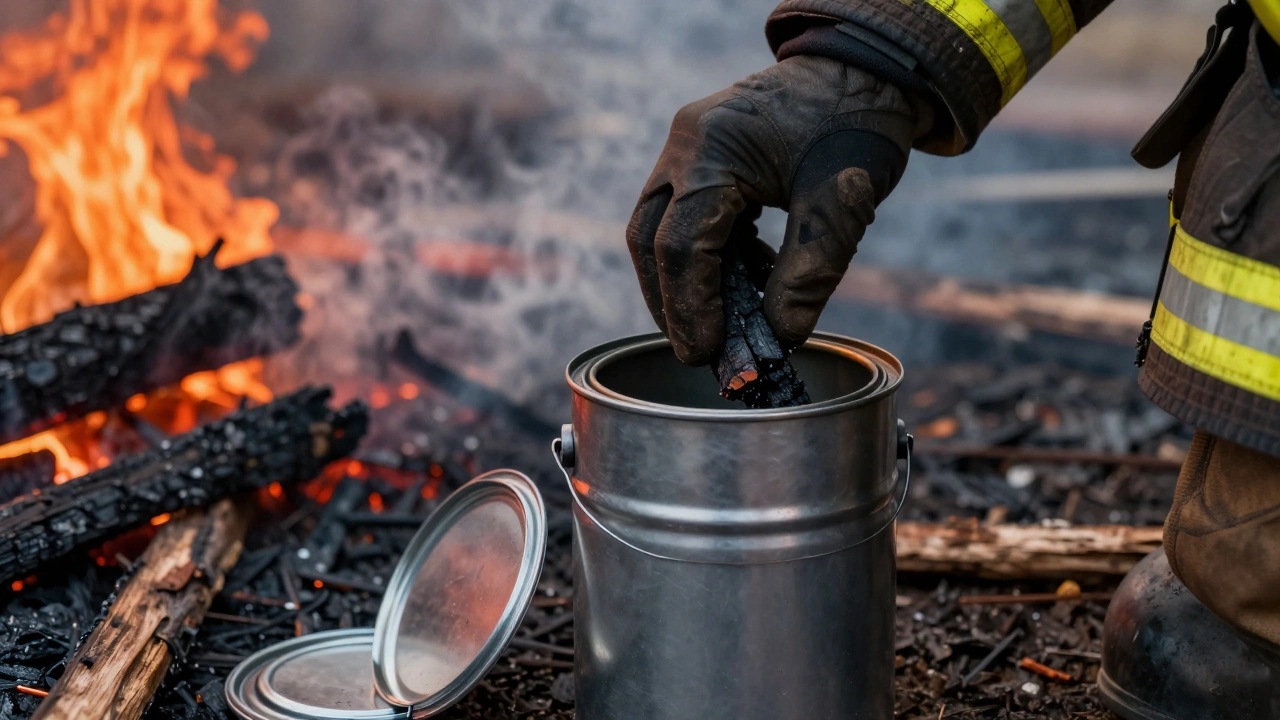
Collecting Ignitable Liquids: The Airtight Rule
If you are investigating a fire, the rules flip completely. With ignitable liquids, you want to trap the vapors, not let them breathe. Gasoline and other accelerants are highly volatile. They turn into gas at room temperature. If you put fire debris in a plastic bag or a paper box, those vapors will escape through the microscopic pores in the material.
The California Department of Justice’s Physical Evidence Bulletin PEB-10 is clear on this: Do NOT use plastic containers, plastic bags, or paper bags. They are porous to ignitable liquids and can interfere with the chemical profile of the sample.
Instead, follow these steps:
- Use Metal or Glass: Collect fire debris in clean, unused, unlined metal paint cans (typically 1-gallon size) or glass jars with tight-sealing, solvent-resistant lids. Teflon-lined caps are ideal because they don’t react with organic solvents.
- Seal Immediately: Close the lid tightly as soon as the sample is inside. Every second counts. Evaporation starts the moment the liquid is exposed to air.
- Comparison Samples: If you are comparing a suspected accelerant to a known source, try to use the same type of container for the comparison sample to ensure consistency in testing.
- Transport Carefully: Pack the cans to prevent breakage during transport. Do not stack heavy items on top of them.
Remember, the goal here is to preserve the volatile compounds so a lab can run gas chromatography-mass spectrometry (GC-MS) analysis. If the volatiles escape, the lab will come back with a negative result, even if gasoline was present.
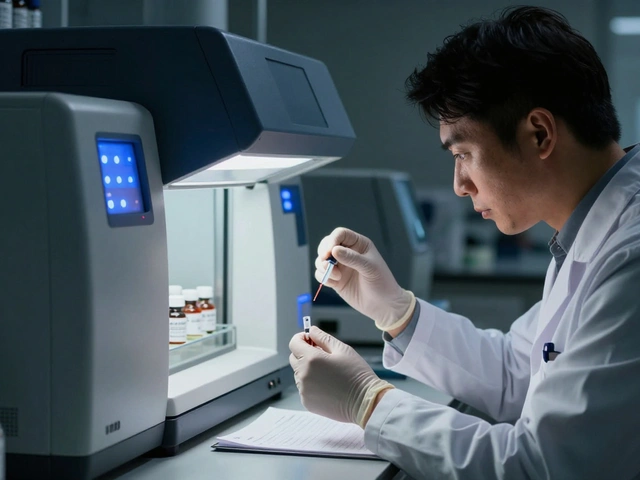
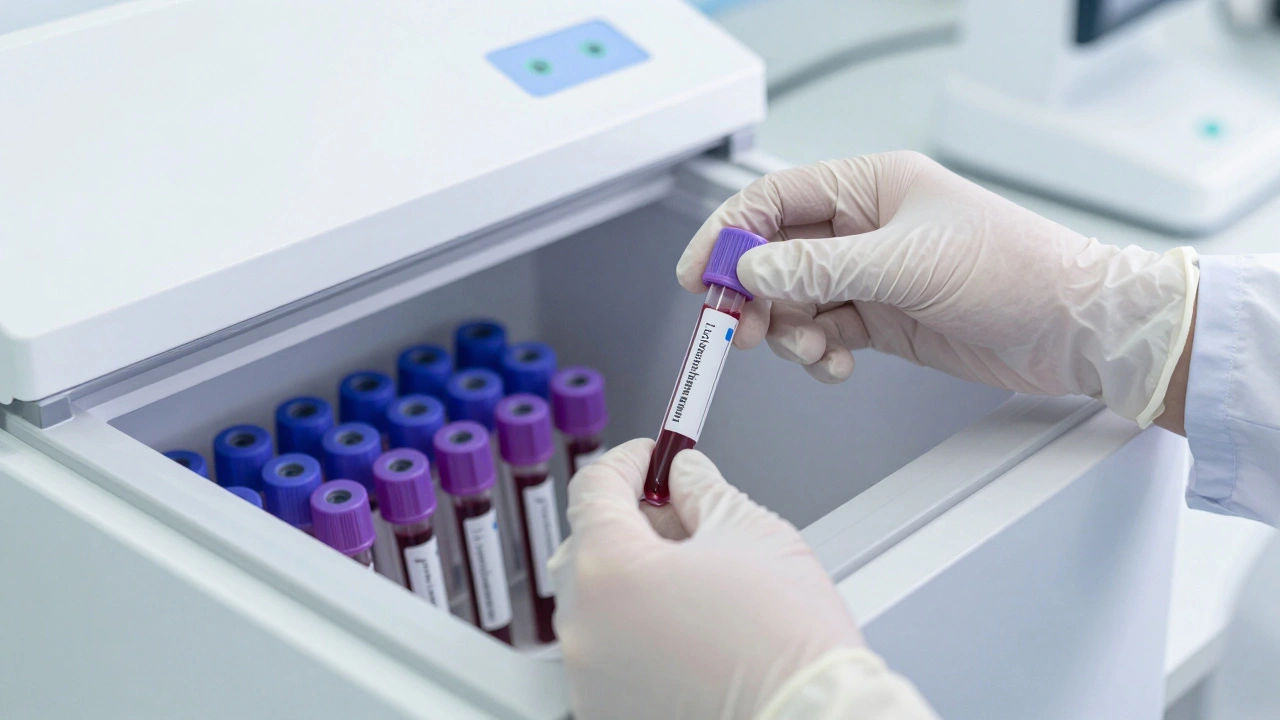
Collecting Toxicology Specimens
Toxicology samples are different because they are usually collected by medical professionals or trained phlebotomists, not necessarily crime scene technicians. However, the handling principles remain critical.
When collecting blood or urine for drug or alcohol testing:
- Chemical Compatibility: Use tubes that are chemically inert. For blood, this often means vacutainers with specific additives. For example, fluoride and oxalate salts are added to blood samples to inhibit glycolysis (the breakdown of glucose by bacteria), which can artificially raise ethanol levels over time.
- Volume Matters: Collect enough volume for initial testing and potential re-testing. The AAFS Academy Standards Board recommends minimum amounts to ensure sufficient material for confirmation tests.
- Labeling: Label every tube clearly with the subject’s name, ID number, date, time of collection, collector’s identity, and any preservatives used. Ambiguous labels can lead to exclusion in court.
Unlike biological evidence where drying is key, toxicology samples stay liquid. Therefore, temperature control is your primary defense against degradation.
Storage Conditions: Temperature and Time
Once collected, where does the evidence go? The answer depends on how long it will sit in storage and what type of liquid it is.
| Evidence Type | Short-Term (< 72 hrs) | Long-Term (> 72 hrs) | Key Risk |
|---|---|---|---|
| Dried Biological (Paper) | Room Temp (20-25 °C) | Refrigerated (2-8 °C) or Frozen (≤ −20 °C) | Mold, Bacterial Growth |
| Liquid Biological (Tubes) | Refrigerated (2-8 °C) | Frozen (≤ −20 °C) | DNA Degradation |
| Ignitable Liquids (Metal/Glass) | Cool, Dark Place | Refrigerated or Frozen | Evaporation, Volatilization |
| Toxicology (Blood/Urine) | Refrigerated (2-8 °C) | Frozen (≤ −20 °C) | Glycolysis, Chemical Breakdown |
NIST defines long-term storage as any period exceeding 72 hours. For most DNA-containing samples, freezing is the gold standard. Room temperature storage is acceptable only for dried biological items that are stable and will be analyzed quickly.
For ignitable liquids, cold storage slows down evaporation. Even though they are in airtight containers, keeping them in a refrigerator or freezer minimizes the kinetic energy of the molecules, reducing the pressure inside the container and the risk of slow leakage or degradation.
Preventing Contamination and Maintaining Chain of Custody
Even if you collect and store the evidence perfectly, it’s worthless if you can’t prove who touched it and when. Chain of custody is the legal backbone of your evidence.
Start by photographing the evidence in situ before touching it. Document the location, condition, and surrounding context. When you collect the item, seal it immediately. Use tamper-evident tape. Sign across the seal with a permanent marker. Include the date, time, and your initials.
Every time the evidence changes hands-from the crime scene tech to the property room clerk, to the lab analyst-it must be logged. Use evidence management software with barcoding to track movements. This reduces human error and provides a digital audit trail.
Also, consider cross-contamination. Package each item separately. Don’t put a bloody sock in the same bag as a stained shirt. Even if they are from the same victim, separate packaging prevents the transfer of trace evidence that might link different parts of the scene. As the Innocence Project notes, commingling items is discouraged unless absolutely necessary and documented.
Common Pitfalls to Avoid
In practice, several recurring errors undermine cases:
- The Plastic Bag Mistake: Putting wet clothes in a plastic zip-lock bag. This is the #1 cause of degraded DNA evidence. The moisture gets trapped, mold grows overnight, and the DNA becomes unreadable.
- The Trash Bag Error: Putting fire debris in a black plastic trash bag. The volatiles permeate the thin plastic, and the plasticizers in the bag can interfere with lab results, creating false positives or masking the actual accelerant.
- Ignoring Odor: Assuming that because something smells like gasoline, it’s safe to leave open. Ignitable liquids continue to evaporate even if you can’t see the liquid anymore. The vapor is the evidence.
- Poor Labeling: Writing "Suspect's Shirt" on a bag without a case number or date. If multiple cases are in the same room, this leads to mix-ups.
Next Steps for Agencies
If you are responsible for evidence handling in your department, review your supply inventory. Do you have enough unlined metal paint cans for fire investigations? Are your biological evidence kits stocked with sterile, DNA-free swabs and paper envelopes?
Invest in training. NIJ and Innocence Project guidelines can be taught in short blocks for basic officers, focusing on glove use, drying, and paper packaging. Fire investigators need more specialized training on NFPA 921 standards and ASTM methods for ignitable liquid collection.
Finally, upgrade your storage. If you are still storing wet evidence in cardboard boxes in a hot garage, you are losing evidence. Invest in climate-controlled property rooms with refrigerators and freezers designated specifically for evidence. Ensure these units have temperature logs to prove compliance during audits.
Can I store wet biological evidence in a plastic bag if I freeze it immediately?
Generally, no. While freezing slows bacterial growth, the best practice is to air-dry biological evidence and store it in paper. If immediate freezing is impossible and drying is not feasible, collect the liquid into sterile laboratory tubes with preservatives and freeze those. Plastic bags are risky because they can tear, leak, or create condensation issues upon thawing, leading to mold.
Why can't I use plastic bags for fire debris?
Plastic bags are porous to volatile organic compounds (VOCs). Ignitable liquids like gasoline evaporate quickly, and the vapors pass through the plastic. Additionally, chemicals in the plastic (plasticizers) can leach into the sample, interfering with laboratory analysis and potentially causing false results.
How long should I air-dry biological evidence?
You should air-dry until the item is completely dry to the touch. This can take anywhere from 30 minutes to several hours depending on humidity and airflow. Using a drying cabinet or fan can speed this up. Never package an item that feels damp.
What is the best container for ignitable liquid residues?
Clean, unused, unlined metal paint cans (1-gallon size) are the industry standard. Glass jars with Teflon-lined caps are also excellent. These materials are non-porous and impermeable to vapors, preserving the chemical integrity of the sample.
Do I need to wear gloves when collecting all types of liquid evidence?
Yes. Always wear disposable gloves to prevent transferring your own DNA to biological evidence and to protect yourself from hazardous chemicals in ignitable or toxicological samples. Change gloves between handling different items to avoid cross-contamination.
What temperature should long-term biological evidence be stored at?
For long-term storage (more than 72 hours), biological evidence containing DNA should be stored frozen at or below -20 °C (-4 °F). This halts enzymatic and bacterial activity that degrades DNA.
Can I use the same swab for multiple surfaces?
No. Each surface or distinct area should be sampled with a new, sterile swab. Using one swab for multiple locations commingles evidence and makes it impossible to determine the origin of any traces found later.
How do I label liquid evidence properly?
Label with the case number, item number, description of contents, date, time, collector’s name/ID, and location where collected. Use permanent markers that won’t smudge. For tubes, write on the label, not the cap, as caps may be removed.