Imagine walking into a room where a crime just happened. In a few hours, that space will be scrubbed clean, the yellow tape will be gone, and the physical evidence will be bagged and tagged in a lab. If the photos aren't perfect, crucial context is lost forever. That's why evidence photography is the process of creating a permanent, official visual record of a crime scene exactly as the perpetrator left it . It isn't just about taking a few pictures; it's about documenting spatial relationships and tiny details that could be the difference between a conviction and a dismissed case.
Whether you're a rookie investigator or just curious about forensics, you need to understand that a camera is a tool for measurement, not just art. To do this right, you can't just snap random shots. You need a systematic approach that moves from the big picture down to the smallest fiber. If you miss a transition shot, you've created a gap in the evidence chain that a defense attorney will exploit in court.
The Three-Tier Documentation Strategy
You can't just jump straight to the blood splatter or the weapon. You have to build a visual map for anyone who wasn't there. Investigators use a three-tier system to ensure no one gets lost in the images.
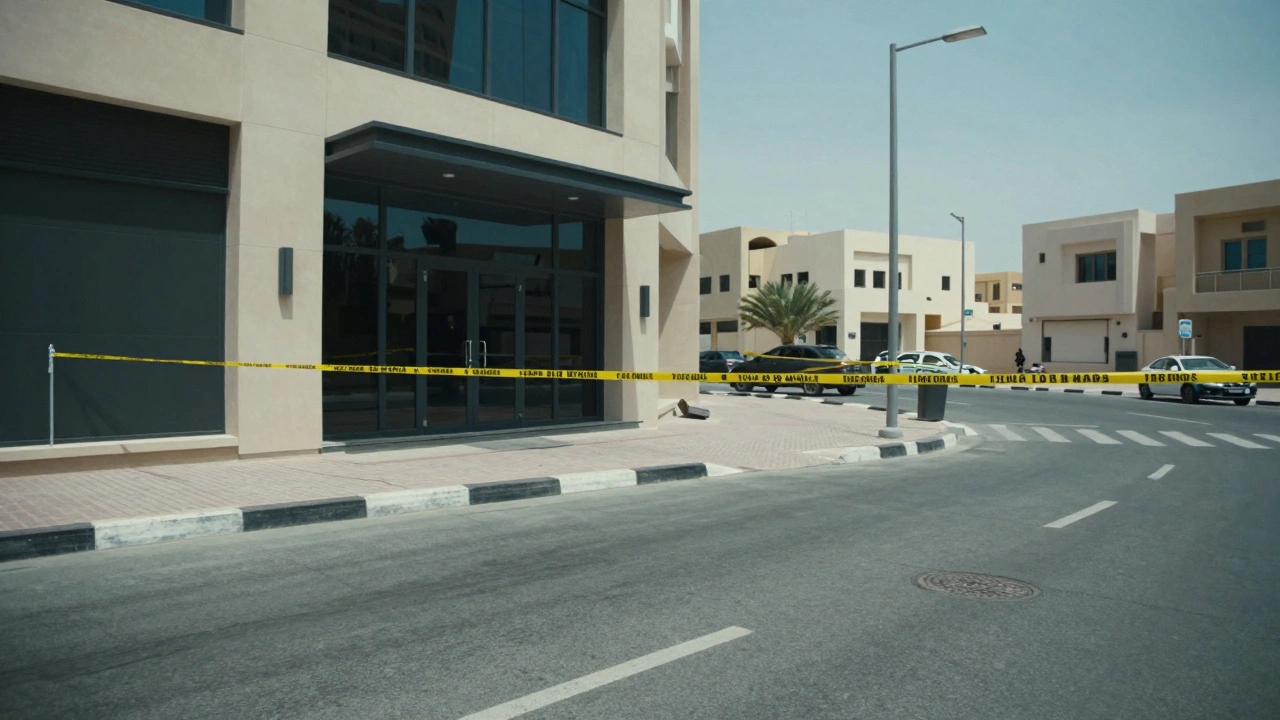
First, you start with overview photographs. These are your scene-establishers. Think of these as the "where am I?" shots. You need to capture the rest of the street, the building entrance, and the general layout. If you're outdoors, you must take photos facing all four compass directions. Why? Because a photo of a body in a field is useless if you can't prove which way is North or where the nearest landmark is. Always include street signs or building names to anchor the scene to a real-world location.
Next, you move to medium-view photographs. These are the bridge between the wide shot and the detail. A medium-range photo shows the layout of a specific area and establishes the relationship between different pieces of evidence. For example, if there's a shell casing three feet away from a handgun, the medium shot proves that distance. You want to fit as many evidence markers as possible in one frame without losing clarity. This prevents the "isolated evidence" problem where a jury doesn't know where a piece of glass was actually found.
Finally, you take close-up photographs. This is where you focus on the nitty-gritty: the scratches on a door frame, a fingerprint on a glass, or a bloodstain on a carpet. To avoid distortion, you have to keep the camera sensor plane perfectly parallel to the evidence. If you tilt the camera, you change the perceived dimensions of the object, which can ruin the forensic value of the image.
Mastering Scale and Measurement
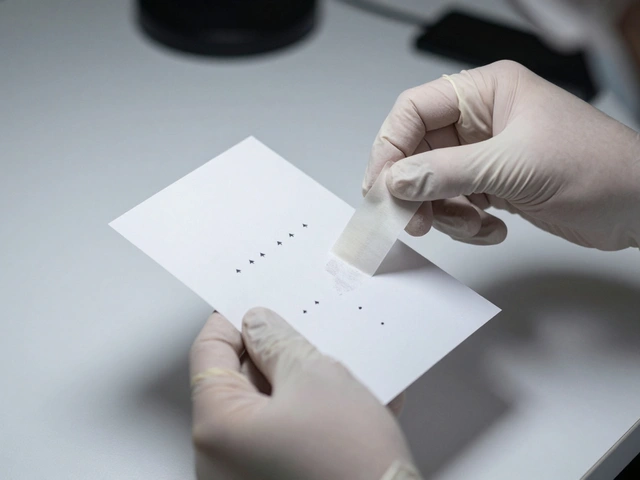
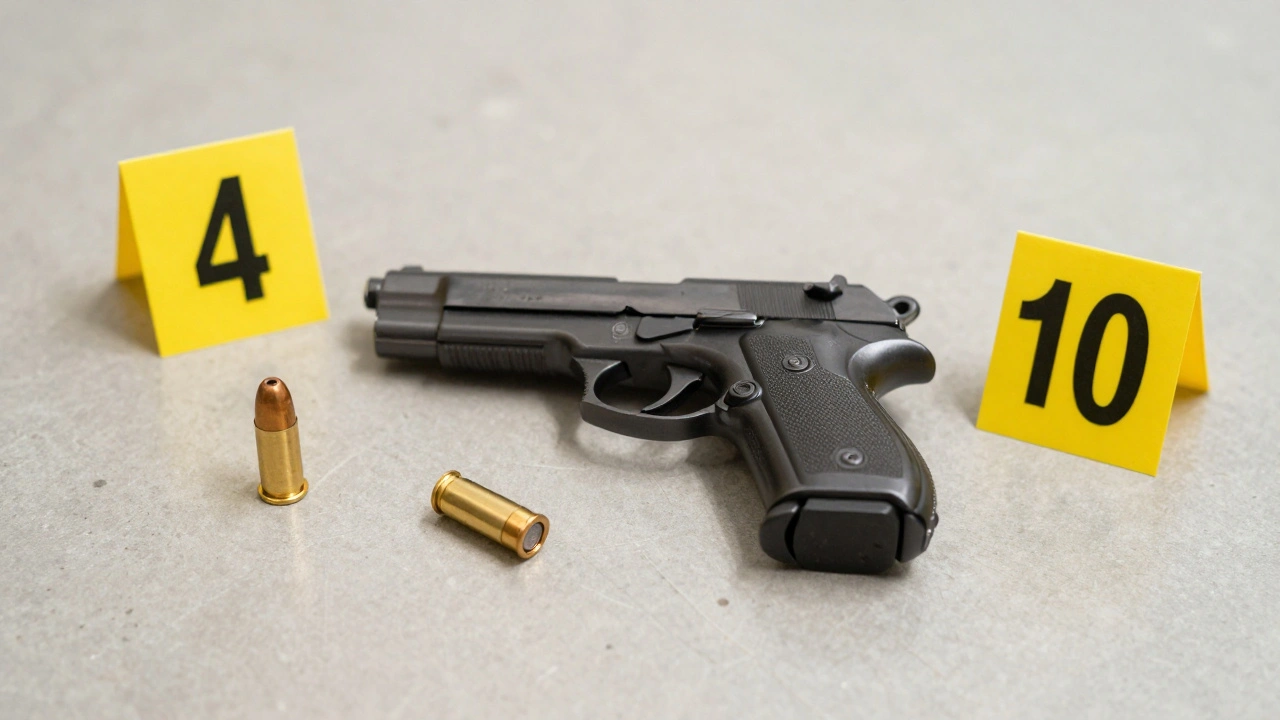
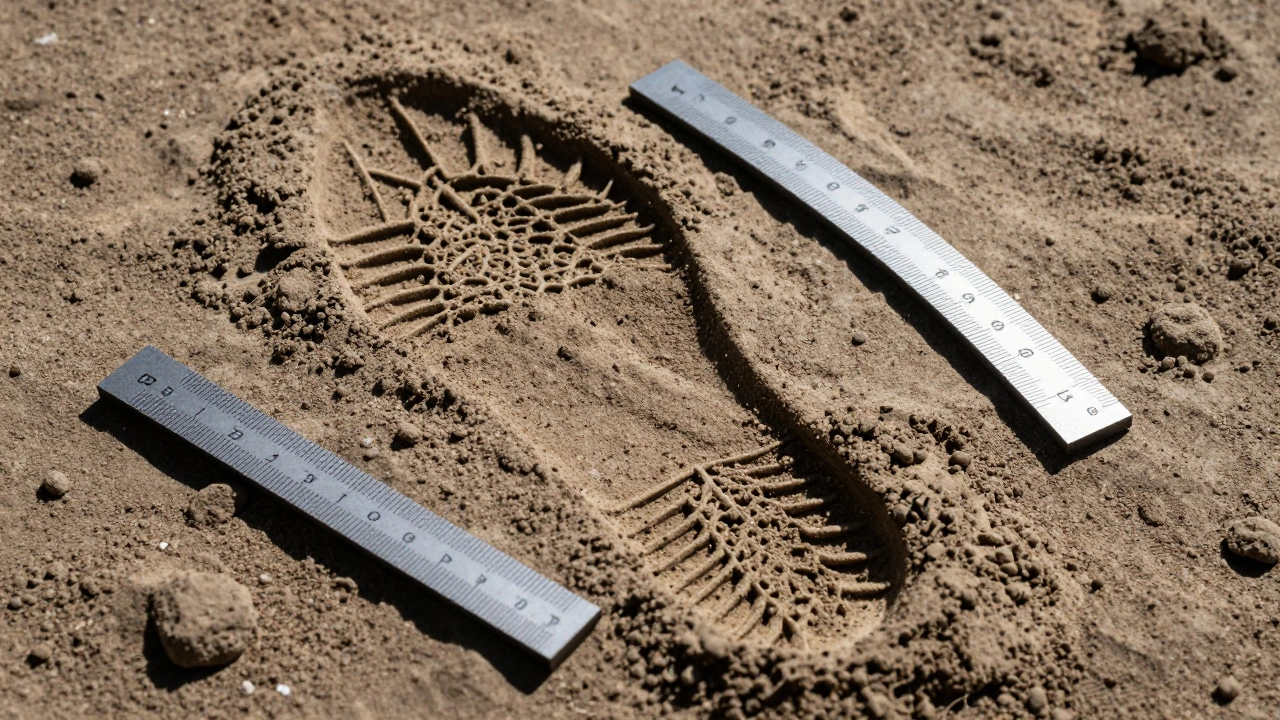
A photo of a footprint without a scale is just a picture of a shape. To make it evidence, you need a reference. Evidence Scales are standardized rulers or markers placed next to an object to provide a precise measurement of size and proportion .
There is a golden rule here: every item of evidence gets two photos. One without the scale (to show the scene in its pristine, unaltered state) and one with the scale. The scale should be on the same plane as the evidence. If you're photographing a footprint in mud, don't hold the ruler an inch above the ground; lay it flat in the mud next to the print. Also, never let the marker actually touch the evidence, as you risk contaminating the sample.
| Evidence Type | Scale Placement | Camera Angle | Key Requirement |
|---|---|---|---|
| Footprints/Tool Marks | Same plane as impression | 90° (Parallel) | Contrast-heavy lighting |
| Bloodstains | Parallel to surface | 90° (Parallel) | Tripod for stability |
| Small Items (Casings) | Adjacent to item | Top-down | Two photos (with/without scale) |
Technical Lighting and Stability
Lighting isn't about making the photo look "good"; it's about making the detail visible. When you're dealing with impression evidence, like a tire track in the dirt, a direct flash usually washes out the detail. Instead, use oblique lighting. This means positioning your light source at a low angle to create shadows in the indentations, which makes the pattern pop.
If you're working in a lab, ditch the tripod for a Copy Stand, which is a specialized vertical apparatus used to hold a camera perfectly perpendicular to a flat object . For field work, a tripod is non-negotiable for close-ups. Why? Because when you get close to an object, the depth-of-field becomes incredibly shallow. A tiny shake of your hand can blur the very detail you're trying to capture.
Handling Special Scenarios
Not every crime scene is a tidy living room. Sometimes you're in the middle of a desert or a forest with no landmarks. In these cases, standard overview photos aren't enough. You'll need to use GPS devices to record exact coordinates and include a north-pointing arrow in your photos. Without these, a footprint in the sand is practically invisible to the rest of the investigation team.
Vehicles require their own specific protocol. You need to document every entrance and exit point. Look for pry marks from crowbars or screwdrivers around the door frames. These marks are essentially "fingerprints" of a tool, and when photographed correctly, they can be matched to a specific tool found in a suspect's garage.
When it comes to victims, the focus shifts to condition and position. You need to document injuries and the body's orientation relative to the rest of the room. Every photo must be taken at the correct angle to eliminate distance distortions. If a photo makes a wound look larger or smaller than it actually is, it can lead to incorrect medical or forensic conclusions.
Common Pitfalls and Pro Tips
- The "Gap" Error: Failing to take a mid-range photo. If you jump from a wide shot of a room to a close-up of a knife, you haven't proven where the knife was in that room.
- Plane Parallelism: Tilting the camera. Always imagine a glass pane between your lens and the evidence; they should be perfectly parallel.
- Flash Overexposure: Using a direct flash on shiny surfaces. This creates a "hot spot" that hides evidence. Use off-camera lighting or diffusers.
- Marker Overlap: Placing the evidence marker on top of the evidence. This is a major mistake that can lead to a piece of evidence being thrown out of court.
Why do I need photos both with and without a scale?
The photo without the scale proves the evidence was not altered or moved before the investigator arrived. The photo with the scale provides the necessary data for analysts to determine the actual size of the object, which is critical for matching tool marks or footwear.
What is the best film for impression evidence?
While digital is standard today, in filmography, black-and-white film is preferred for impressions because it offers higher contrast and sharper detail than color film, making it easier to see the ridges of a footprint or the strike of a tool.
How do you handle a scene with no landmarks?
In areas like deserts or open fields, you must use GPS coordinates to mark the location. Additionally, you should place a north-pointing arrow in the frame of the evidence photo to provide a directional orientation for future investigators.
How do I avoid distance distortion in photos?
Distance distortion happens when the camera is at an angle. To avoid this, ensure the sensor plane of your camera is exactly parallel to the object you are photographing. Using a tripod helps you lock in this 90-degree angle.
What should be included on a photograph identifier label?
A proper label should include the incident or case number, the date of the photograph, the names of the victim or suspect associated with the evidence, and the specific evidence item number.
Next Steps for Proper Documentation
If you are setting up a scene documentation kit, start by gathering a variety of scales (both L-shaped and linear) and a sturdy tripod. For those in a lab environment, investing in a high-quality copy stand will save hours of frustration. Once you've captured your images, ensure they are uploaded to a secure evidence management system. Remember, the goal is a complete narrative: the viewer should be able to "walk through" the scene visually, moving from the street, into the room, and finally to the microscopic detail of the evidence.