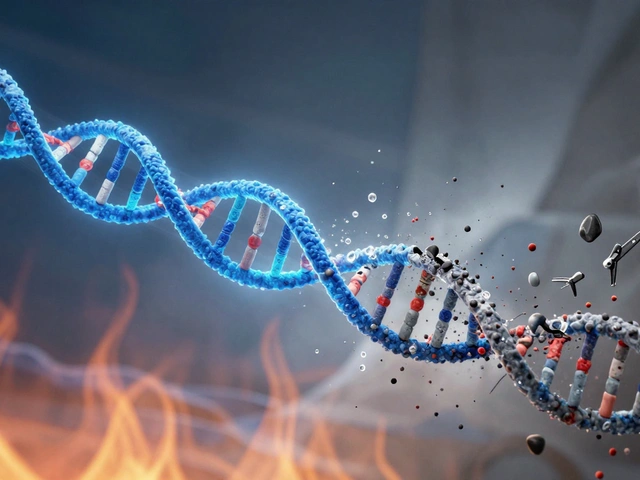
Wet biological evidence is a ticking clock. If you leave a blood-soaked shirt or a wet swab sitting in a plastic bag for too long, bacteria will feast on the sample, destroying the DNA before a criminalist ever sees it. This isn't just bad luck; it's biology. Moisture and heat create the perfect environment for bacterial growth, which can render critical evidence useless for prosecution or exoneration. Getting this right requires more than just hanging clothes up to dry-it demands strict adherence to specific timelines, environmental controls, and packaging protocols.
The stakes are high. The National Institute of Justice (NIJ) explicitly states that failure to preserve biological material correctly could preclude the generation of DNA results entirely. Whether you are a first responder collecting evidence at a crime scene or a lab technician processing items in a facility, understanding the proper procedures for biological evidence drying is non-negotiable. This guide breaks down exactly how to handle wet biological materials, from the moment they leave the scene to their final long-term storage.
Why Drying Is Critical for DNA Preservation
The primary enemy of biological evidence is moisture. When biological materials like blood, saliva, or tissue remain wet, they become breeding grounds for bacteria and fungi. These microorganisms consume the cellular material, breaking down the DNA strands that forensic analysts need to create profiles. According to guidelines from Pure Gold Forensics, degradation is most commonly caused by exposure to moisture and heat.
You might think refrigeration solves this problem. While cold temperatures slow down bacterial activity, they do not stop it indefinitely, and they certainly do not remove the moisture. Refrigeration is only a temporary holding measure. The ultimate goal is air-drying. Once the water evaporates, the biological material stabilizes, allowing it to be stored for years without significant degradation. However, rushing this process or doing it incorrectly introduces new risks, such as contamination or incomplete drying, which can lead to uninterpretable results.
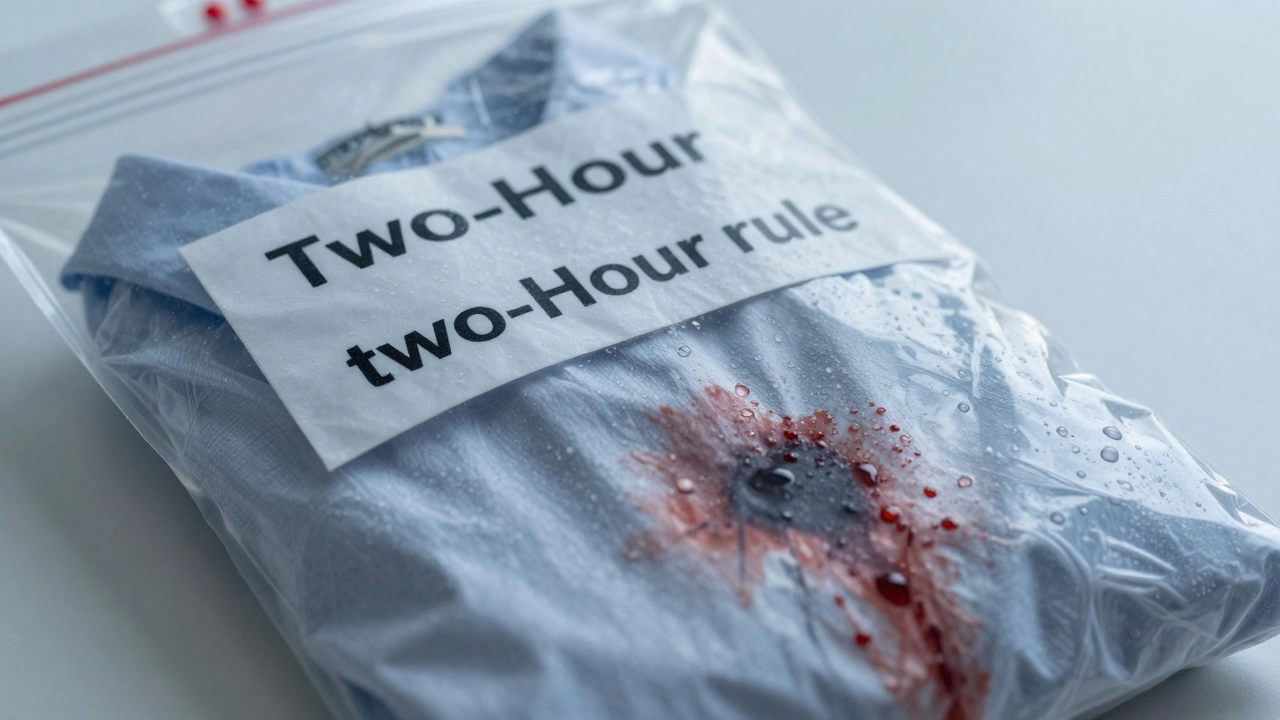
Immediate Handling: The Two-Hour Rule
The clock starts ticking the moment evidence is collected. Many agencies transport wet evidence in plastic containers because they are leak-proof and secure during transit. But plastic is also airtight, trapping moisture inside. This creates a humid incubator for bacteria.
To prevent damage, there is a strict timeline you must follow:
- Transport: Use leak-proof containers for transport to ensure safety and prevent leakage.
- The Two-Hour Limit: Upon arrival at the laboratory or evidence processing facility, evidence must be removed from plastic packaging within two hours. This standard is cited in procedures like those from the Cincinnati Police Department.
- Temporary Storage: If immediate drying is not possible, place the evidence in a refrigerator maintained between 2°C and 8°C (35°F to 46°F). Keep it away from direct sunlight.
Never store wet evidence in plastic long-term. If you arrive at the lab and find evidence still sealed in plastic after two hours, you have already compromised its integrity. The priority is getting that moisture out.
Drying Methods: Low-Tech vs. High-Tech Solutions
Not every agency has a million-dollar forensics lab. The California POST (Peace Officer Standards and Training) Biological Evidence Preservation Handbook outlines two main approaches to drying: low-tech methods for smaller agencies and high-tech solutions for larger facilities.
Low-Tech Drying Areas
If your department lacks specialized equipment, you can use isolated, secure areas designated specifically for biohazard drying. Common examples include:
- Metal Lockers: Lockers labeled for biohazards can work if they allow airflow. Attach packaging materials to the outside door so you can repack evidence immediately after it dries.
- Showers or Dedicated Rooms: A prefabricated fiberglass shower enclosure elevated on a wooden frame is an effective low-cost solution. The elevation allows for controlled drainage underneath. Ideally, this area should have an adjacent water faucet with a cleaning hose for decontamination between uses.
Regardless of the space, surfaces must be cleanable and non-porous to allow for proper decontamination. The area must be isolated from general facility traffic to prevent accidental contamination.
High-Tech Evidence Drying Cabinets
Larger agencies often invest in Evidence Drying Cabinets. These units provide security, climate control, and infrastructure to maintain chain of custody while evidence dries. They act as temporary storage solutions that bridge the gap between collection and analysis. Companies like McMurray Stern design these cabinets to ensure that evidence remains secure and intact until a criminalist can process it. For agencies with high volumes of wet evidence, this automation reduces human error and ensures consistent drying conditions.
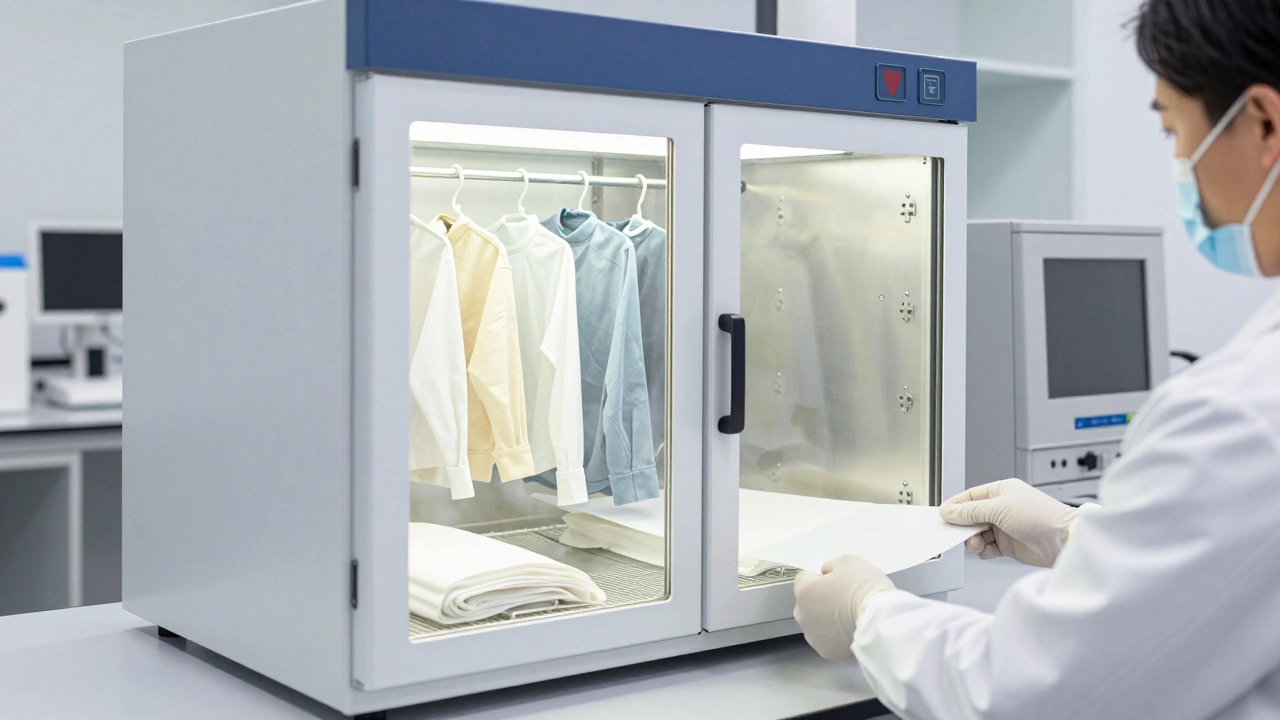
The 24-Hour Minimum Timeline
How long does it take to dry evidence? There is no single answer because it depends on the volume of fluid, the fabric type, and ambient humidity. However, procedural standards provide a clear minimum threshold.
The Cincinnati Police Department’s procedure manual specifies that evidence must remain in a blood drying cabinet for a minimum of 24 hours before removal. After this period, the processing officer must contact a supervisor to arrange pickup. This 24-hour rule serves as a checkpoint to ensure that surface moisture has evaporated sufficiently to begin further processing.
Do not assume 24 hours is enough for thick carpets or heavy coats. Visual inspection and touch tests (using sterile tools, never bare hands) are necessary to confirm complete dryness. If the item is still damp, extend the drying time. Rushing this step leads to mold growth during storage.
Preventing Contamination During Drying
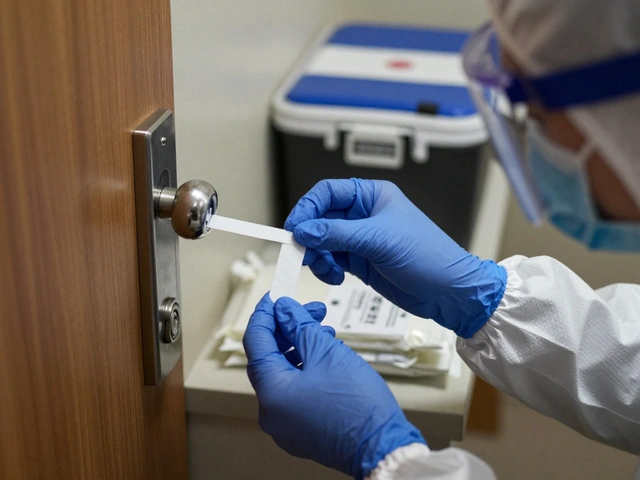
Drying is not just about removing water; it’s about protecting the sample from foreign DNA. Contamination can occur through cross-contact between items or from handlers. Follow these strict protocols:
- Gloves: Always wear latex gloves. Change them between handling each individual item of evidence.
- Separation: Never let two pieces of biological evidence touch each other. Hang garments separately with sterilized paper placed beneath and between them to catch drips and minimize contact.
- Work Surfaces: Process evidence on clean areas, such as fresh butcher paper. Clean work surfaces with a 10% bleach solution before starting.
- Respiratory Hygiene: Avoid talking over open evidence. Wear masks if necessary to prevent respiratory droplets from landing on samples.
- One Item at a Time: Focus on one piece of evidence per session to reduce the risk of cross-contamination.
Note that the paper used beneath drying garments may contain trace evidence. Package this paper separately and submit it with the garment. It could hold crucial clues.
Packaging and Long-Term Storage
Once evidence is thoroughly dried, the packaging strategy changes completely. Wet evidence needs containment; dry evidence needs breathability.
| Evidence Type | Container Material | Storage Condition | Prohibited Actions |
|---|---|---|---|
| Dried Stains (Clothing, Swabs) | Paper bags, envelopes, or cardboard boxes | Frozen or refrigerated in humidity-controlled area | Plastic containers or bags |
| Liquid Blood Samples | Original glass or plastic tubes | Refrigerated (2°C to 8°C) | Freezing liquid samples (risk of shattering glass/cell lysis) |
| Tissue, Organs, Bones | Air-tight, sterile plastic containers | Frozen or refrigerated | Exposure to high humidity |
| Urine Samples | Air-tight, sterile plastic containers | Frozen or refrigerated | Leakage during transport |
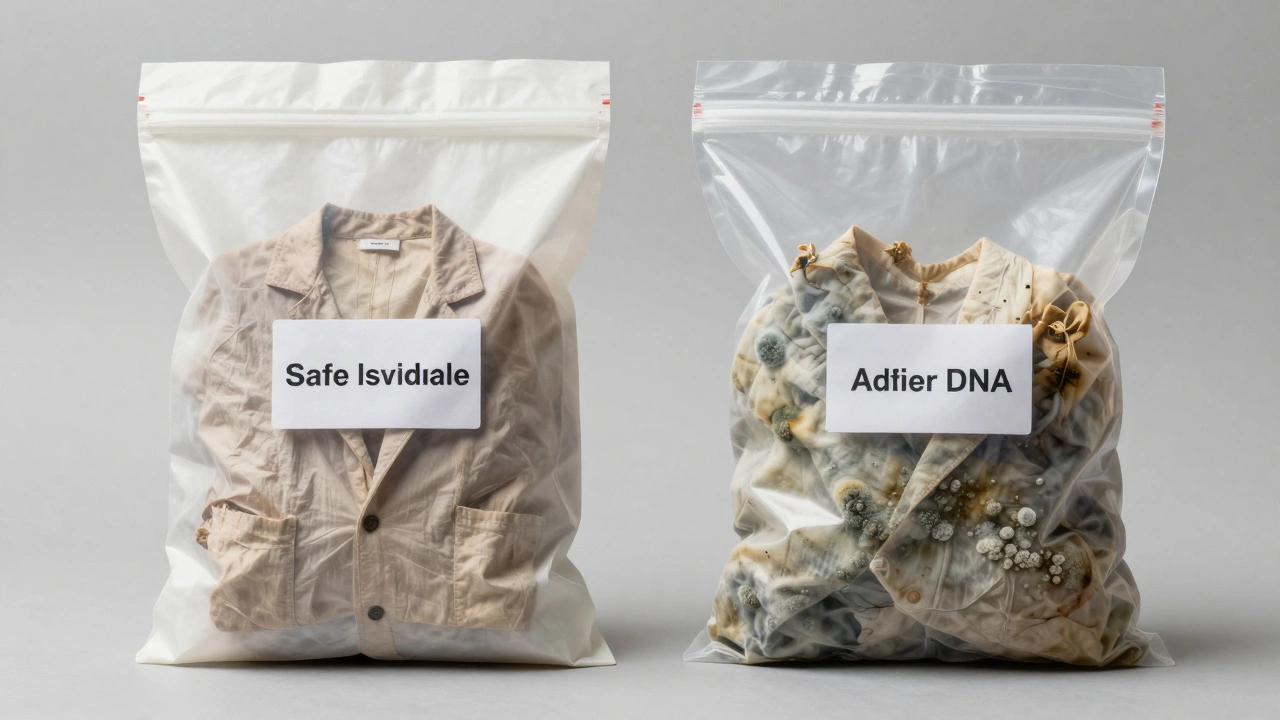
For dried stains, plastic is strictly prohibited. Plastic traps residual humidity, leading to mold growth over time. Paper allows the material to breathe. Liquid blood samples are an exception-they stay in their original tubes but must never be frozen while liquid, as ice crystals can rupture cells and shatter glass containers. Tissue and bone samples can go into sterile plastic containers once dry.
Long-term storage should always be in a humidity-controlled area. Depending on your agency’s resources, this means either room temperature (if humidity is tightly controlled) or frozen storage. The NIJ warns that failing to establish appropriate storage policies can make samples useless for future cold case investigations.
Common Pitfalls to Avoid
Even experienced handlers make mistakes. Here are the most common errors that compromise evidence:
- Leaving evidence in plastic too long: Remember the two-hour rule. Plastic is for transport, not storage.
- Incomplete drying: Putting slightly damp clothes into paper bags leads to mold. Ensure items are bone-dry before packaging.
- Cross-contamination: Failing to change gloves or using the same workspace for multiple items without cleaning.
- Ignoring trace evidence: Throwing away the paper used under drying garments instead of submitting it.
- Freezing liquid blood: This destroys the sample’s utility for certain types of analysis.
By following these steps, you ensure that the biological evidence remains viable for DNA testing, whether it’s needed tomorrow or ten years from now. Proper drying isn’t just a bureaucratic step; it’s the foundation of reliable forensic science.
How long should biological evidence be dried?
While drying times vary based on item size and humidity, many agencies, including the Cincinnati Police Department, mandate a minimum of 24 hours in a drying cabinet before further processing. Items should be inspected to ensure they are completely dry before being packaged.
Can I store wet biological evidence in the freezer?
No. Wet evidence should be refrigerated at 2°C to 8°C (35°F to 46°F) for temporary storage prior to drying. Freezing wet evidence can damage cell structures. Liquid blood samples should also never be frozen in their liquid state due to the risk of container shattering and cell lysis.
Why is plastic bad for storing dried biological evidence?
Plastic traps moisture and prevents airflow. Even if evidence appears dry, residual humidity can get trapped in plastic bags, leading to bacterial and fungal growth over time. Dried stains should always be stored in paper bags, envelopes, or cardboard boxes to allow the material to breathe.
What happens if I don't dry biological evidence properly?
Improper drying leads to bacterial growth, which consumes the DNA in the sample. This can result in degraded or destroyed DNA, making it impossible to generate a profile. The National Institute of Justice notes that this could preclude DNA results entirely, rendering the evidence useless.
How do I prevent contamination during the drying process?
Use latex gloves and change them between each item. Hang garments separately with sterilized paper between them to avoid contact. Work on clean surfaces treated with a 10% bleach solution. Avoid talking over open evidence to prevent respiratory droplet contamination.
Is there a time limit for removing evidence from plastic containers?
Yes. Evidence transported in plastic containers should be removed from plastic within two hours of arrival at the laboratory or processing facility. Prolonged exposure to plastic traps moisture and encourages bacterial growth.