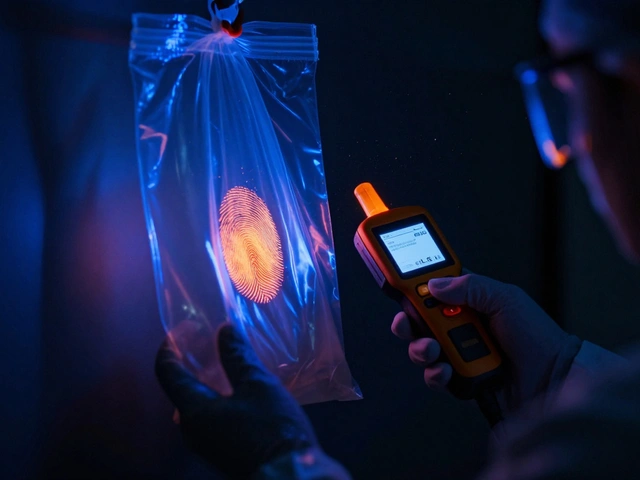
When a fingerprint is left behind at a crime scene, it’s not just a smudge-it’s potential proof. But that smudge is fragile. If it’s not lifted, labeled, and stored correctly, it can be ruined before it even reaches the lab. Latent print cards are the backbone of fingerprint evidence, and how you handle them makes all the difference between a case that solves and one that falls apart.
What Are Latent Print Cards?
Latent print cards are rigid, white-backed sheets designed to hold lifted fingerprint or palm print impressions. They’re not regular paper. They’re made to keep the delicate ridge detail intact while being transported from a crime scene to a forensic lab. These cards are used after an investigator uses fingerprint tape to lift prints from surfaces like glass, metal, or plastic. The tape, now carrying the print, is carefully pressed onto the card’s adhesive surface. Once done, the card becomes the official container for that piece of evidence.
These aren’t optional tools. Every major state forensic agency-Arizona POST, Georgia Bureau of Investigation, Washington State Patrol, Virginia Department of Forensic Science, Idaho State Police-requires them. Why? Because a single mislabeled card can lead to contamination, confusion, or even a court throwing out evidence. The system only works if every step is done right.
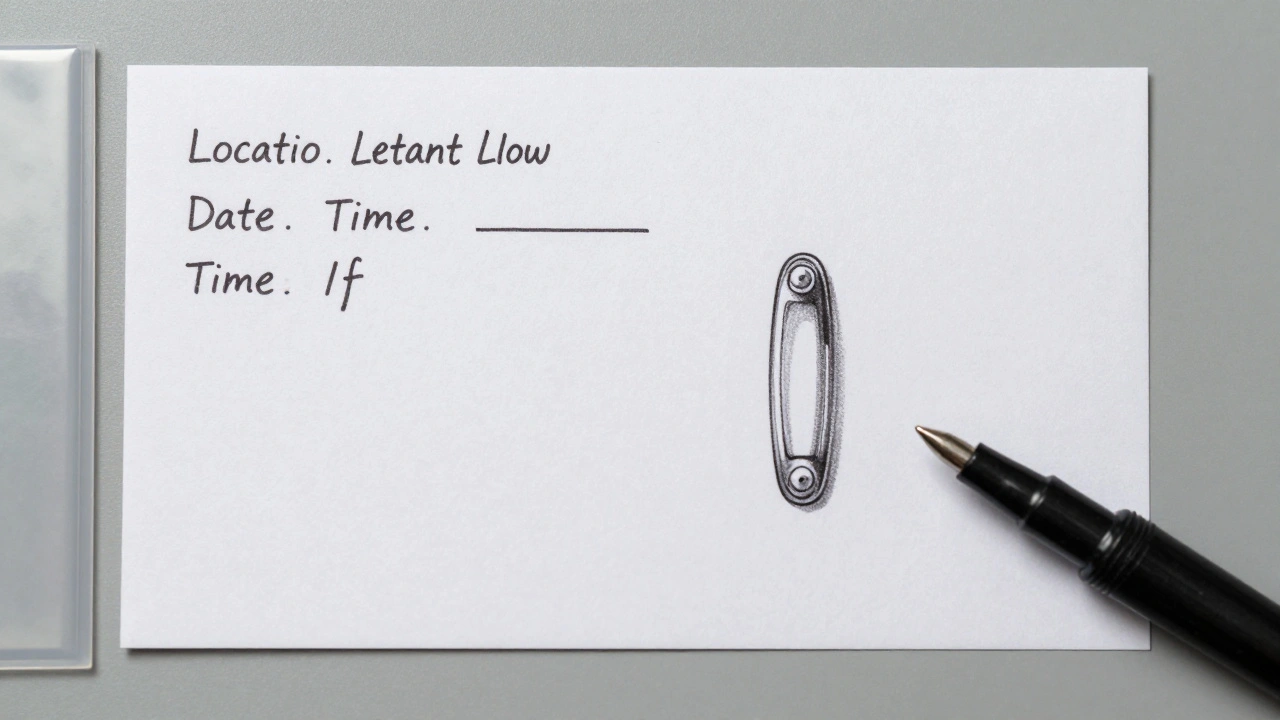
Labeling: Front and Back Matter
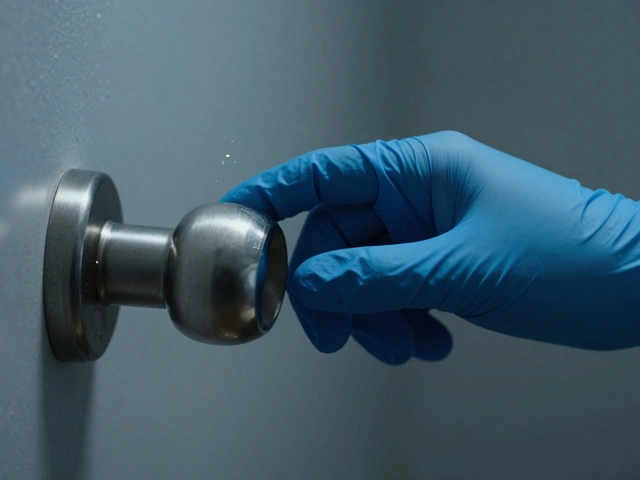
Labeling isn’t just writing a name and date. It’s a precise, two-part process. The front of the card must show orientation. Draw small arrows pointing upward to show which way the print faced when it was left. If the print came from a doorknob, the arrow tells the analyst which direction the person was facing. No arrows? You might as well have sent a blurry photo.
The back of the card holds the real details. This is where you write:
- The exact location where the print was found (e.g., “Left side of metal door handle, 3 feet from floor”)
- The date and time of collection
- Your initials or badge number
- A simple sketch of the object the print came from
Georgia Bureau of Investigation requires that all evidence be initialed and dated-but never directly over the print. If there’s no space, tag the item or place it in a sealed bag with the label on the outside. Never write on the tape itself. That smudges the ridge detail. And never use a pencil. Ink smears. Use a permanent marker. Ballpoint pens are fine. Sharpies? Avoid them-they bleed through thin tape.
Washington State Patrol adds one more rule: if you’re submitting multiple cards, each one gets its own unique ID number. And the outer package? It must say how many cards are inside. “5 latent lift cards” isn’t enough. Write “Lift Card #001 through #005.” That way, if one goes missing, you know exactly which one.
How to Lift and Transfer the Print
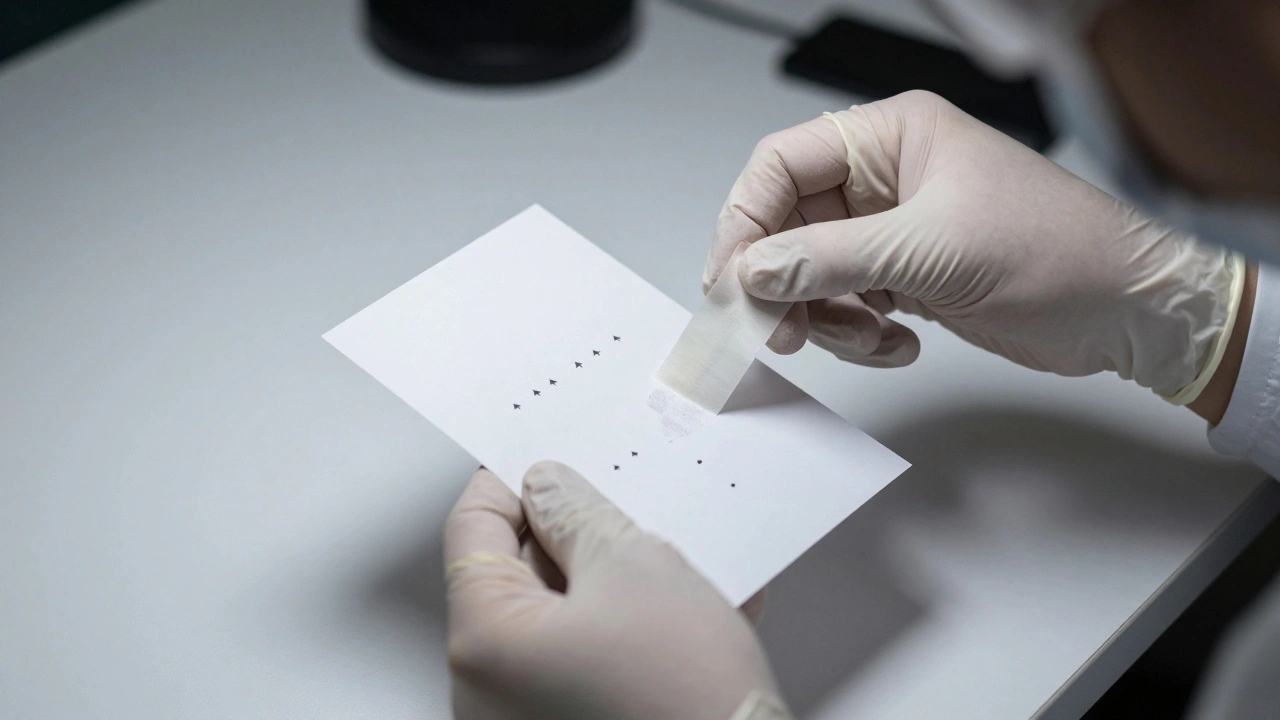
It’s not as simple as pressing tape and peeling. There’s technique. Arizona POST training shows investigators fold a small edge of the tape to make a handle. That way, you don’t touch the sticky part with your fingers. You hold the tape taut, press it firmly onto the surface, then use a smooth object-like a credit card or a plastic squeegee-to smooth it out. Why? Air bubbles ruin ridge detail. If the tape isn’t flat, the print won’t transfer cleanly.
For large prints-like a palm print that spans 4 inches-you can’t use one card. You need multiple lifts. Tape the first section, transfer it to Card #1. Then move to the next section, lift it, and place it on Card #2. Align them later in the lab. Don’t try to stretch the tape. That distorts the ridges. And if you’re lifting from a curved surface like a bottle, you might need to cut the tape into strips and lay them side by side. The goal? Preserve every ridge, whorl, and minutia.
Pro tip: Use a latent print pad as an anchor. When you’re lifting from a vertical surface, like a wall, hold the card steady with your non-dominant hand while you apply the tape. If the card moves, the print smears. Practice on dummy surfaces before going to a real scene.
Packaging: What Not to Do
Once the print is on the card, packaging is next. And this is where a lot of evidence gets destroyed.
First rule: Never put adhesive tape in a paper envelope. Paper fibers stick to the tape. They clog the ridges. Instead, use a plastic sleeve or a sheet protector. Slide the card into it, then place the protector into a sealed plastic bag. If you’re submitting multiple cards, put them all in one bag-but keep them separated with stiff cardboard between each one. No stacking. No crumpling.
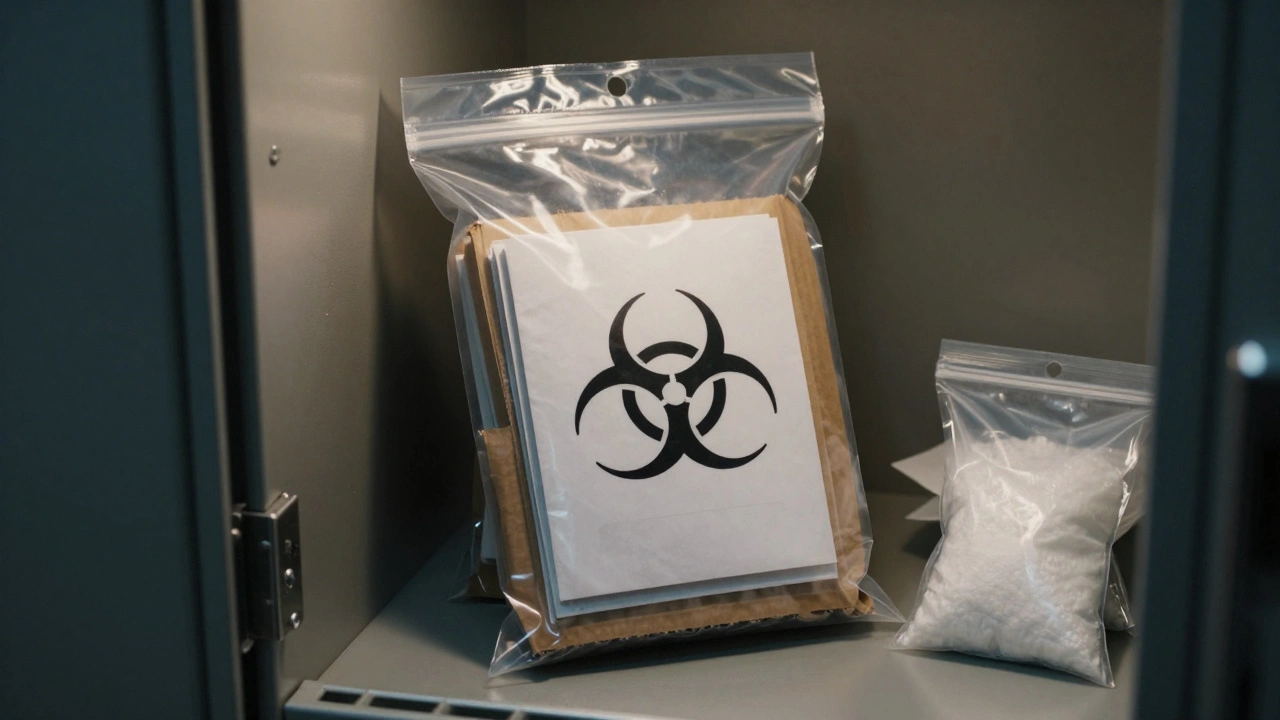
If the print came from something bloodstained? You must mark the package with the biohazard symbol. Georgia Bureau of Investigation requires this. It’s not optional. Even if the blood is dry, it’s still biological evidence. And if the item was taken from a clandestine drug lab? Each card must be sealed in its own plastic bag. Why? Because chemicals from those labs can contaminate other prints. One contaminated card can ruin an entire batch. Washington State Patrol says if you’re unsure, call SWAT. They’ve been trained for this.
And never wrap anything in cotton, cloth, or paper towels. These materials absorb oils and destroy latent prints. Even if you’re just storing the card temporarily, use rigid packaging. A shoebox lined with foam? Fine. A crumpled paper bag? No.
Storage: Keep It Dry, Keep It Still
Latent prints don’t last forever. Heat, moisture, and movement ruin them. The Georgia Bureau says wet items must be air-dried before packaging. Never use a hair dryer. Never put them in the sun. Let them dry naturally, flat on a clean surface. If you’re storing prints for more than a few hours before transport, keep them in a cool, dry room. A temperature-controlled evidence locker is ideal.
Never store cards where they can rub against each other. Even light contact can wear down ridge detail. That’s why separation with cardboard is so important. And never, ever use paper clips, staples, or tape on the card itself. That’s evidence tampering. If you need to attach documentation, use a separate envelope.
Also, don’t leave prints in a hot car. Or in a damp basement. Or next to a window. Sunlight fades prints. Heat causes oils to migrate. If you’re working in a humid climate-like Portland, Oregon-you need to be extra careful. Use silica gel packs in your evidence bag if you’re transporting over long distances.
Elimination Prints and Standards
Every latent print you submit needs a baseline for comparison. That means inked prints from everyone who had legal access to the scene. Think: homeowners, roommates, first responders, cleaning staff. These are called elimination prints.
Standard 10-print cards are the norm. They capture all ten fingers, rolled and flat. But here’s the gap: palm prints. About half of all latent prints found in investigations come from palms, not fingers. Yet, most investigators don’t collect palm standards. Big mistake. If you suspect a palm print was left, get the suspect’s palm prints too. Use a palm print card or the bottom half of a 10-print card. Don’t assume the lab will guess. They need the exact match.
And never send a photocopy of a 10-print card. Ever. Labs need the original inked impression. A fax or scan loses ridge detail. If the original is lost, the case might not hold up in court. Always keep the original. Send copies only if absolutely necessary, and note it clearly on the submission form.
Quality and Standards
Forensic labs don’t just look at prints-they judge them. The Idaho State Police uses three terms to classify quality:
- Quantity: How much of the print is visible?
- Clarity: Are the ridges sharp and distinct?
- Comparison Value: Can it be matched to a known print?
If a print is labeled “No Value (NV),” it’s because it’s too smudged, partial, or distorted. That doesn’t mean it’s useless. It means it can’t be used for a positive ID. But it can still help rule someone out. That’s why labeling orientation matters. If the print is upside down, the lab might miss key features.
Training manuals from Virginia and Arizona require officers to practice on known prints. You lift a print you know is there. You label it. You submit it. Then you compare it to the original. If you can’t match it, you go back and figure out where you messed up. That’s how standards are maintained.
Final Checklist
Before you hand over your latent print cards, run through this:
- Is the print fully transferred onto the card with no air bubbles?
- Are arrows drawn on the front showing upward orientation?
- Is the back labeled with location, date, time, and your initials?
- Is a sketch included showing the object and print position?
- Is each card numbered (e.g., #001, #002)?
- Is the outer packaging labeled with total card count?
- Is the card in a plastic sleeve, not paper?
- Are multiple cards separated by stiff cardboard?
- Is the package sealed and marked if it contains biological material?
- Are elimination prints (finger and palm) submitted with the latent prints?
If you answered yes to all ten, you’ve done your job right. The lab will thank you. The case will have a better chance. And justice will be served-not because of luck, but because you followed the rules.
Can I use regular tape instead of fingerprint tape?
No. Regular tape doesn’t have the right adhesive properties to lift latent prints without damaging ridge detail. Fingerprint tape is specially designed to be non-staining, non-distorting, and low-tack. Using household tape can smear, stretch, or leave residue that ruins the print. Always use tape approved by your agency’s forensic protocol.
What if I don’t have time to label the card at the scene?
You still need to label it-before transport. Never leave a card unlabeled. If you’re in a rush, write the basic info (date, your initials, location) on a sticky note and tape it to the outside of the sealed bag. But get the full label done as soon as possible. Unlabeled evidence is often rejected by labs. It’s not just bad practice-it’s legally risky.
Can I store latent print cards in a refrigerator?
Not unless it’s a controlled evidence storage unit. Regular refrigerators have high humidity and condensation, which can degrade prints. Moisture causes oils to spread and ridges to blur. If you need to delay submission, store cards in a dry, room-temperature room with silica gel packs. Never use a kitchen fridge.
Why do some labs reject prints from clandestine labs?
Because those environments are full of chemical contaminants-solvents, acids, residues-that can destroy prints or make them unreadable. If you collect a print from a drug lab without isolating it in its own sealed bag, the chemicals can transfer to other evidence. Labs won’t risk processing contaminated samples. Always bag each item from a clandestine site separately.
Do I need to submit palm print standards even if I only found finger prints?
Yes-if there’s any chance a palm print was left. About half of all latent prints are from palms, not fingers. If you don’t collect palm standards, you might miss a match. Always ask: Could the suspect have placed their palm on the surface? If yes, get the print. It’s better to have extra data than to lose a critical lead.